Pages

Sunday, August 21, 2011

not what I expected from Craft Apple

Since I have another little person's stuff to carry around when I go out, I've spent quite a bit of time looking online for bag/tote patterns. One that I loved when I saw the cover image was the Chemisette Handbag Pattern from Craft Apple.

Since I am somewhat sleep deprived, I just looked at the photo and thought "that looks perfect!" without actually reading the specs. Because from the photo, it looks like a large bag that would hold my wallet, a couple of diapers, wipes, sunglasses and have a little extra room for things a Mama would carry. And with that, I ordered it.

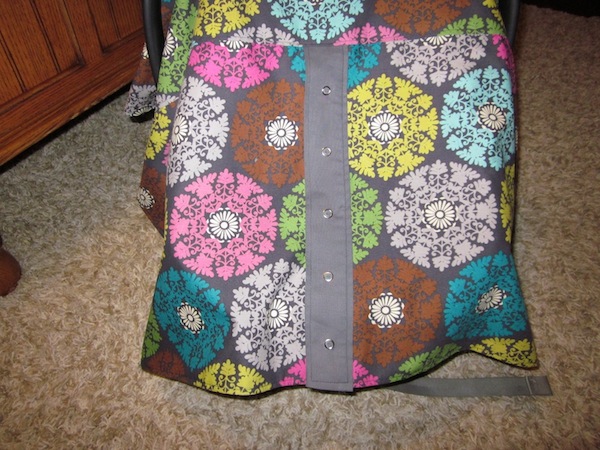
I picked out the fabric I wanted and started to put it together. I thought it looked a little small as I was cutting out the pattern. About halfway through, I actually read the back of the pattern... Approximate dimensions of finished bag: 10" wide x 15" tall (including straps) x 2" deep.

Really?!? The bag looks much bigger from the photo. *sigh* I was terribly disappointed. I emailed the pattern maker.

"What size is the bag on the cover of the Chemisette Handbag Pattern? That is what I was expecting when I bought the pattern. There is no way that is the 10" bag made from the pattern... unless a child is holding it.

Had I realized it was this small, I would not have bought the pattern."


Linda from Craft Apple replied, "The bag is 10" wide. It is not a large bag, but the bag on the cover IS the bag that the pattern is written for. The model on the cover is me. I'm not a tall person, but am not miniature either. :) I wrote the pattern for a bag that would hold a wallet and essentials without being a big, heavy, carry-it-all-with-you bag. I hope this helps. Please let me know if you have any more questions."

Sadly, no that doesn't help. I feel like I wasted $12. :-\

The only bright spot is that my daughter likes her new purse. For the record, that's my daughter in the last photo. She is nine years old. Notice how similar the size of the bag looks against her and the one on the cover of the pattern.

Since it went together quite easily, sometime in the future I might make another one... just 130-150% larger.

Tuesday, August 16, 2011

new look

Since I have a lot of time in front of the keyboard while I nurse the little one, I thought a good use of this time would be to finally redo my blog (and etsy store) graphics. I've been planning on doing this since, well, about three minutes after I put the original together.

I'm really liking the grey striped background and the new owl is nice. Check out the store: crafty merle

Thursday, August 11, 2011

car seat cover

After bring home the baby from the hospital, I realized we needed a car seat cover to keep from blinding the child during her first Texas summer.

I had seen one made with a flap in the front and liked that idea, so I searched online for tutorials, but only found ones for a full cover. Time to improvise.

I had two yards of fabric in my stash that sort of went together... not my first choice, but already on hand. I draped the fabric over the seat and kind of eyeballed it. I used snaps on the flap.

I think it turned out ok.  :-)

Sunday, August 7, 2011

just in time!

The quilt is all finished! I'll have to get back to you with full size photos, but in the meantime, can show these...

I finished up just as labor started, threw it in the washing machine and focused on the task at hand.

Despite all odds, I got my un-medicated vaginal birth after two previous c-sections! And it was only a four hour labor! Her Daddy is already smitten. :-)

Thursday, July 28, 2011

and then it got a little crazy

With my mug rug completed, I was super inspired to do something bigger. I guess it's a good thing that I had no concept of how much fabric 'two big handfuls' actually is. LOL! I had almost enough to put together the Fenced In pattern in a large lap size! So, I added another print and a solid and got busy.

It took a couple of days to get all the strips cut out... especially since the unborn one makes it difficult to sit down for an extended period of time, however I got it all cut. Then I laid it all out on the living room table, rearranged, was happy, oops... switch out some more, and then left it out overnight so I could look at it in the morning.

After some breakfast and coffee, I was still satisfied with the layout and started the fun part... sewing. It's amazing how much you can get done in one day! Especially when the munchkin is spending time with the grandparents.  ;-)

This is how it looked when I decided to stop for the night.  The top is all sewed together!  :-)

I still need to add a border. And I have some fabric coming in the mail tomorrow that I plan on using for the back. In the meantime, I need batting!

Monday, July 25, 2011

how I started with quilting

Quilting is something I've been interested in for many years. I have vague childhood memories of my Big Granny, an ancient little woman, sitting in a rocking chair in the living room of my Granny's house working away on quilts by hand. I have an awesome sister that can whip out a full size quilt in a weekend just for fun. I have an appreciation for the Amish and their amazing quilts. You get the picture.

But, my own personal quilting experience was a baby quilt for my oldest child (that I only made the top and my sister had to finish for me), and two beginnings... meaning I cut up fabric and may or may not have started piecing them together. And all of those were simple nine patch.

So, when my friend Sarah suggested we crash a Dallas Modern Quilt Guild meeting, I could not believe my ears when my mouth said "OK"!

Really? When do I have time to quilt? And these women have certainly been quilting for far, far longer than I had. I have to admit I was a bit scared. However, I went. My husband was convinced I'd walk into a room full of little blue-haired women, but this was not the case. This was a room full of woman my age and younger! Yes, there were a few older than me, but only a few. And they were so nice! I have to admit I was even a bit surprised. So this is Modern Quilting! I thought "I'm liking it here!". Halfway through the meeting I knew I'd be back and even wanted to join the group. And so on June 21, I did.

When I walked into the July meeting, I could not help but notice a large box of long skinny scraps in my favorite colors: pale grey, turquoise, white, red and black. It turns out Moda Fabrics sent the fabric for an upcoming collection and challenged the group to "create a mini quilt measuring anywhere from mug rug size (10" square) to wall hanging size (24" x 24")" and show it at the September meeting. I got two big handfuls of fabric and went on my way.

My brain was spinning. I had recently purchased The Practical Guide to Patchwork by Elizabeth Hartman. The first project in her book is 'Fenced In' or Rail Fence. This fabric would be perfect! But the challenge was for a mug rug, so after spending some quality time with Google, I decided on a pattern and within 48 hours went from a pile of scraps to my very first finished piece!

This was just the beginning. Stay tuned!

Sunday, July 10, 2011

I have a slight handbag obsession

I love handbags. There, I said it. Whenever I come across a new bag pattern or tutorial that I like, the wheels start turning. The most recent was the Ava Rose Tote from artsy-crafty babe, Rebeka Lambert.

Conveniently, my daughter needed a bag to carry her crochet supplies. I told her I would make her a bag... because she needed one and I wanted to try out the pattern before making one for myself. Win, win!

I took her to Jo-Ann Fabric to pick out her own fabric. After looking at everything, she picked fabric with pink cat silhouettes. I didn't notice until we got to the cutting counter that it was paneled fabric. *sigh* I'll make it work.

It took a while to get everything figured out since I had to work around the design (and I had to splice some of the longer pieces), but I got it all together. As soon as I finished I thought I didn't like it as much for me, but by the next morning I had thought of a few ways to tweak it a bit. And by 'tweak it a bit', I mean drafting my own pattern and winging it.

It had taken me a while to find just the right fabric, but I did find it at Hobby Lobby. And as I was deciding to add outside pockets, I noticed some striped fabric I had on hand would work with the new fabric I had bought specifically for this bag. Sweet!

It took most of the day to put together because I slowly thought it through (meaning I didn't have to rip it apart and redo anything). I think it came together nicely.

In case you are wondering about the tweaks... this bag is one inch shorter, the straps are 1/2 inch wider, the top of the bag is more square and I added outside pockets.

The button I've had for years, but it was black. Good thing I had a can of white spray paint just sitting around. ;-)

Wednesday, July 6, 2011

living room re-do

The transformation is complete!

I would show you a dramatic 'before' photo of the living room, but apparently I didn't even like it enough to take any photos. :-O However, feel free to check out the previous blog post with the old rug and curtains.

I made slipcovers for the pillows in bright turquoise, floral and striped fabric. You can never have too many pillows! Craigslist came through with the purchase of a new-to-me neutral 8' x 10' frieze area rug. That alone really pulled the room together.

Next was locating the perfect curtain fabric. Once again Golden D'or rocks my world! I found this awesome neutral striped fabric and whipped up the new curtains in a couple of days.

Now I really like my living room! <3

But to love it, I'm thinking that lamp needs a new shade and to be painted turquoise. ;-)

Wednesday, June 29, 2011

birthing skirt

I've been thinking about the upcoming labor and birth of this child. One thing that came up was "what to wear?"

I know I want to be comfortable during labor and will probably do most of that at home where I don't care what I have (or don't have) on, but there will come a point where we will have to leave the house and go to the hospital. While I may be comfortable being mostly naked in my home, I'm sure strangers will not appreciate being subjected to the visual of a mostly naked laboring woman.  o_O

While cruising the interwebz, I came across a few mentions of a labor/birthing skirt. It makes sense. You need something that is easy to move around it and is also easy for any monitoring my midwife needs to do (as in "is it time to push yet?"). There is a company that does sell them for $65-$35, but I am not willing to spend that kind of money on something that may be worn once.

So, I decided to make a wrap skirt. I started with this basic pattern and made modifications. I had some olive green rib knit material that I had bought some time ago (because it was cheap), and digging through my stash turned up a complimentary cotton fabric.

The entire thing took a few hours. You can see from the photo that I was too lazy to switch out the white thread on the serger. Oh, the horror! LOL I doubt my doula or midwife will care. The baby certainly won't.  ;-)

Tuesday, June 28, 2011

an apron for me

After making the apron for my BFF's birthday, I decided to make one for me. I fell in love with this paisley fabric with bright green and turquoise some time ago. After realizing it matches my kitchen, I thought it would be perfect for an apron.

The first two pictures don't do it justice. The fabric is beautiful!

I did make a few tweaks on the pattern. The bib is wider than the original and I squared off the pocket.

I love it!

Monday, June 27, 2011

shorts for the munchkin

And here are shorts for the toddler! They are a variation of Made's Kid Pants with Flat Front converted into shorts and added pockets.

The floral print is just supposed to be a tester fabric, but it's pretty cute and she has a shirt that goes with it.

The real fabric is khaki cotton twill (just like the shorts for her older sister).

And did I mention she is a bit of a ham in front of the camera? =)

Sunday, June 26, 2011

organizing the projects

Since I have more ideas than time, my ever-growing stack of projects have been quickly getting out of control. One day last week while nesting organizing the bookcases in my sewing room, I found a package of large plastic bags.

I had an idea! Project bags! Instead of having random stacks of fabric sitting around (and sometime not remembering what said fabric was for), I could use the bags for storing the pattern, fabric, notions, notes and whatever else is needed for a particular project. Organization at my fingertips! No more searching for stuff!

Now my shelves hold neat project packs patiently waiting for me to find more time.  :-)

Saturday, June 25, 2011

happy birthday!

With the birth of the newest member of our family coming up quickly, I decided it would be best to get some projects completed ahead of schedule. One in particular was a birthday gift for my BFF.

First, the back story. You see, for quite some time I have been on the hunt for the perfect apron pattern. Aprons are fun to wear and I've never actually had one of my own. And my BFF is quite the chef, so an apron seemed like a good idea for a birthday gift. While cruising craft/sewing blogs one day, I stumbled upon this: The Flirty Girl Apron. Perfect!

The dotty fabric is just her style and the hot peppers... well, she is a natural redhead! It went together fairly easily even with the slight modifications I made along the way. And best yet... she loves it!


As an added bonus, I also made matching pot holders. :-)
Happy Birthday!

Friday, June 24, 2011

khaki shorts

Here are the khaki shorts! I really like being able to whip together a pair of shorts in three hours. Of course, I probably could do it faster without constantly being interrupted. Ah, the glamorous life of a Mama.

shorts for the kids

With summer upon us, I thought it would be a good idea to whip up a few pairs of shorts for each of the kids.

I easily found a pattern for the unborn one. It's Made By Rae's Basic Newborn Pants. OK, not really shorts, but will cover the tiny hiney.

The wild child gets a variation of Made's Kid Pants with Flat Front. Once again, not shorts, but easily converted into shorts.

The oldest took more of a search. I couldn't find anything in commercial patterns I liked, but after some online searching, found this PDF pattern on etsy.

I decided to make these first. I like the pockets and overall style, however, they were way too short for my liking, so I added 5" to the length. The photo is the 'muslin'. I like them. She likes them. All is well. The next pair will be khaki twill.

Wednesday, June 22, 2011

not just sewing

I have another project in mind.

While checking craigslist for the 368612th time for a coffee table, I saw this one. This is exactly what I have been looking for and the price was right! I loaded up the kids and drove out to get it.

Since I am in the process of changing up the living room colors, I'm thinking I will sand this down and paint it teal or turquoise (since the husband isn't too keen on me painting the living room walls one of those colors).

I've already switched out the pillows. See the icky before and awesome after pics. I am really digging the new print with turquoise. In fact, look for more pillows in the very near future.

And before you say anything, I'm already on the lookout for some neutral-ish fabric for the drapes... that will mean another trip to Golden D'or.

Oh, and I'm searching for the perfect cream rug.

Stay tuned!

and we are back!

I was at Costco this morning stocking up on the regular things we use when I decided to take a look at the cameras. For the record, I <3 Costco, and today they did not fail. They had a newer version of our old camera with $20. off! I could afford that!

So, without further ado, we return to adding photos to the posts. :-)

Sunday, June 19, 2011

rest in peace my faithful camera

You will have to just imagine what I am talking about for a while. My camera has fallen victim to the two-year-old. :-( 

I did not notice that she put it in the washing machine before I washed a load of laundry. Needless to say, it did not survive. Thankfully the photos I had taken had been downloaded the night before.

So, I will continue to sew and post and hopefully will come back to add photos when we find a replacement camera.

Saturday, June 18, 2011

fourth time is a charm


In my shirtmaking adventure, the first shirt was, um, icky.

The second was too small. I may go back to it after the husband loses some weight. Until then, it's a UFO (unfinished object) on the side of my sewing table.

The third was too big and I had to alter to twice. And there were flaws. Also the fabric was heavy.  However it may work for a winter shirt.

But the fourth one... the fourth one is AWESOME! It fits perfectly!

I think I have gotten the hang of it now. There are just a few more little tweaks, but overall I am pleased. Just in time for Father's Day!

I have several fabrics stacked up ready to make into beautiful shirts!

Wednesday, June 15, 2011

no more fear... of buttons!

Before the purchase of my 'new to me' sewing machine, the Elna Quilter's Dream 6003, I had avoided buttons and buttonholes like the plague. My old machine (as I understood, but never actually tried) took a four step process to make buttonholes. This scared me.

Then I got the new machine. It came with 3 automatic one-step buttonholes. This seemed fascinating and I wanted to give it a whirl. It took two things for me to take the first step. The first was for my friend Jacki to come over and show me how to use this interesting device called a buttonhole foot. The second step was to have a project to practice making buttonholes.

I watched in awe as she put a button in the back of the foot, pressed a couple of buttons on the front of the sewing machine and then pressed the foot control. Like magic, the machine make a prefect buttonhole! That was sooo cool! I think I could do that.

I made my first buttonholes on my first tester dress shirt. They were... not perfect, but looked good enough. As I write this post I now have put buttonholes and buttons on half a dozen projects. I love it! Now I even have a preference (other than the default) of settings for perfect buttonholes.

Even better... Jacki has a blog post on How To Machine-Sew a Button. I've taken this one step further after a conversation with my sister where she told me she puts a toothpick under the button as she sews it to give a little wiggle room. Of course, I couldn't get that to work, but found perfection when using a fondue fork under the button for the wiggle room. ;-) Sometimes you have to get a little creative.

Now, I have no fear of buttons!

Monday, June 13, 2011

sewing, but not posting

I know, I know... it's been crazy around here.

I made up a few snoodsnood™s before we left town for a week. As soon as I can locate my camera, I will show them. I also made a shirt for the husband from Kwik Sew 3422. Alas, it is a bit snug. I am not upset since he has started a weight loss program. I'll try it on him again in a few months.

As soon as we got back, unpacked, decompressed and relaxed a bit, I started on another shirt for the husband. This time it's a dress shirt using the pattern Kwik Sew 2777 (in a larger size). The fabric is a bit heavy, but overall I am pleased. I have to add buttonholes and buttons today. Of course he is out of town for a few days. When he returns, I'll have him model it for a photo.

Moving right along... I'm making another shirt from the same pattern with a few modifications. I'm finding the more I sew, the more likely I am to ignore the pattern instructions and wing it. For example, I didn't like the plackets from the pattern, so I made my own. Also, I prefer the cuffs from another pattern, so I'm switching those out as well.


Of course, time away from the sewing machine gave me plenty of opportunity to stack up new projects. One is a new cover for my Boppy pillow. The original cover had something spilled on it that will not come out, and since I had some cute fabric just sitting around, I used the original as a pattern and made a cute new cover. :-) I didn't like the way the flap was closing, so I added these cute little green flower buttons.

I probably should start on baby clothes as I only have eight weeks left of baking the little one!

One last thing... on a 'I really will do that this year' note, I am already planning my Christmas presents for the family!!! Of course, exactly what it is will remain a secret until the end of the year. ;-)

Tuesday, May 24, 2011

introducing snoodsnood™

After several variations of the snood, I have come up with a design that I love! All seams are covered, the fit is snug without being too tight, and it does the job well!

Here is my handsome Gasparo modeling the final version. :-)

And here is Jack.

Now my boys will have long, clean ears! And I have an idea to support our dog show habit. ;-)

Friday, May 20, 2011

head coverings for all

Since the pants went together so quickly, I was inspired to make a few other things that would go together quickly. Much to my husband's dismay, I have a fondness for head scarfs, so I made a few more. Here is one of them.

Another project I've wanted to do was snoods for my dogs. You see, when a long-eared dog puts their head down to eat from a bowl, their ears get dirty or even worse, get nibbled off. To keep that from happening, you put a snood on them.


There is no pattern for something like this, so I've had to make several prototypes to get it how I like it. Here is my unwilling model, Gasparo, with one of the first ones. He was not pleased that I woke him up to check the fit. This one is functional, but not quite where I wanted it to be.

I decided to sleep on it and try to work out the details.